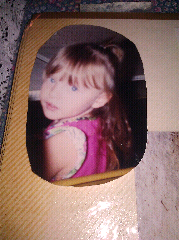
At the end of August, I drew up a simple calender for September determined to find a way to better parent my misbehaving (or so I thought) 2 year old, Elizabeth. I swore that she was just driving me up the wall for a few weeks. So I put on my thinking cap and made a calender to keep track of her good & bad days. It is a simple system, stickers for good days & sad faces for bad.
I had her cornered, right?! Muwahah.
But, again, I was wrong. The further into the month we went, the more I realized she sure had a lot of stickers!
What happened? I thought my toddler was a little brat most of the time. Now, she still has bratty at times. I mean, which kids aren't?
This entire time I had the calender, I was forced to see the great attributes in my daughter that I sometimes overlook when life gets so busy. As a mother, we think we know EVERYTHING about our child. But sometimes we miss the simple things. Those little characteristics about our child that just really makes them shine.
I learned how compassionate she is. I know, maybe that's a weird way to describe a toddler. But it's true. She loves making people happy. She can sense when people are sad, upset or even sick and tries to help. I've had some weird health problems and one day I was very under the weather. I was tired and in a lot of pain. She knew it. How? I don't know. She took it upon herself to bring me a pillow, blanket and yes, a sippy cup ;) The whole day she was an angel. She brushed her teeth, washed & brushed her hair, cleaned her room and more all by herself. Woah! She's a loving little girl.
I also learned how great her memory is. Now, I have always known my daughter is smart. I realized she could remember the smallest details. Her sense of time is amazing. I say things like "We will go see Nana in 4 days" and sure enough, in 4 days she tells me it's time to see Nana!
The biggest thing she taught me was to step back, soak in her great personality and to pick my battles. I came to realize that those days she was bad, was because I didn't want to take a deep breath and choose which battles to fight. Now when she is making a mess because she decided to play with all of her toys in front of the TV, I don't scold her and shoo her to her room. Instead, I sit and play with her. When she is talking to loudly in the store I don't shush her and get embarrassed. Instead, we play a game and see who can whisper a song the longest.
I'm not a perfect mother, far from perfect. But I learn every day how to be a better one. Who would have thought my teacher would be my toddler..
Tuesday, October 18, 2011
Sunday, July 3, 2011
Friendship is like peeing your pants...
Today I got to spend some time with my best friend, Kristi (or as everyone who knows her well, "Sissy") and her little family. Like always, as soon as Elizabeth sees Sissy, Lewis & Colton she gets beyond excited. She just loves her "handsome" (Colton).
We get settled in and I start to BBQ (after my failed attempt to heat/prep the coals). We chat about pointless yet funny things, talk about their upcoming trip to Hawaii *crossing fingers* and our kiddos.
You see, Lewis & Sissy asked me to be the God Mother to Colton while he was still brewing in Sissy's belly. Of course I was so excited and honored to be asked! So my little family became a bit bigger. And I couldn't be happier about it.
So, I rejoiced in spending that time with them and just loved every minute.
Well, there is a point to this blog and that point is just to brag for a minute. :)
As much as military spouses say "civilian friends just don't get it", in my case its just not true (blah, that dreadful "C" word). Sissy has been beyond amazing with all the stuff I have laid thick on her, she let's me talk aimlessly about K and is there when I have my "oh shit" moments. I've really come to realize that you just can't buy this type of friendship! Excuse me, best friendship! ;)
We've been best friends since 3rd grade. While we had our short "break" we would presume as if no time had ever passed after being together again. She has been my rock more than I can count and I only hope I have been able to be that for her!
When I come to her with problems she doesn't just agree with me and tell me what I "want" to hear. She is rational and mature in all her advice. We've grown so much since 3rd grade (obviously hah) and better yet, we've grown together!
Through puberty, awkward middle school, dramatic high school and now beautiful motherhood, we've been at each others side.
So there it is. My brag. I just might have the bestest (yea yea, not a word) friend ever.
Like the bracelet I gave her today says, "Best Friends are Like Stars" because you don't always see them, but you know they're always there.
So this blog is to her. :) Small and invaluable. But still her's nonetheless.
Here's to a friendship that will lead to two old ladies pushing walkers with hot pink tennis balls attached to the legs. Who knows, maybe even some flames painted on them and dice dangling. ;)
Here are some photos to giggle at (well, probably laugh hysterically at) :) Enjoy!


Saturday, June 25, 2011
Conde, the guardian angel?
Wow. Where do I even start?
These last couple of days have been a bit rough. Kris never keeps anything from me when it comes to missions. So like many times before I get the "I'm going on a mission" call. But this time is different. He's feeling uneasy about it. I stay positive, we crack a couple jokes and we push on.
Since he left for this mission, I've been worried (understandably) and missing him big time. I prayed my heart out for comfort.
Lord, please soothe my heart. Give me comfort & keep him safe.
Elizabeth stayed at aunties house, so on my way to pick her up I stopped at a local Christian book store (I'm in the hunt for a new bible) and browsed. This book store has hundreds of books and as I was walking down each isle I spot one with an American Soldier on the cover. So I grab it, randomly open to a page and what I see next brings tears to my eyes.
The first words on the page were
"Sgt. Kenneth Conde"...
Wow.
Of all books I could pick up, why this one? Of all names that could've been used, why his? Lord, what are you trying to tell me.
I felt comfort in seeing Conde's name. Maybe that's God's way of saying, he's okay sarah, Kenneth is watching his back.
Please be safe...the world needs you, but I need you too. I'll wait 100 years for you if I knew you'd come home safe.
For those who don't know who Conde is to us, here's the blog explaining: http://sarahelliecole.blogspot.com/2011/05/kenneth-conde-jr-my-memorial-day.html?m=1

Tuesday, June 14, 2011
Cookies In A Jar: Kabul Kookies
I attempted cookies in a jar after coming to the conclusion that K will soon get tired of getting cakes. Boring old cakes. So, I expanded and thought outside of the jar! Cookies!! So here are some photos from my first attempt.


It worked out decently but took a little more time to prep and the cookies baked at different rates causing some to be soggier than others.
Back to the drawing board I went!
:)
How do I get cookies in a jar without having to layer? Well, I'll share the secret! It was much simpler than I thought! Sometimes I tend to over think, my husband even tells me so ;) haha
Kabul Kookies
Makes: 12-20 Cookies (Fits into 2 pint size jars or one Quart size jar)
Prep Time: 25 min
Cook Time: 20 min
What do you need:
1. WIDE MOUTH JARS! Normally with batter you can get away with the smaller mouth jars, but I highly recommend wide mouth unless you plan on making some tiny cookies. Just trust me and get wide mouth ;)
2. Cookie mix of your choice
3. Tongs (either metal or plastic) **OPTIONAL
Yup, just the two things needed (last is optional) & what ever ingredients the mix calls for. I told you I'd make it as simple as possible! :)
It's KOOKIE time!
1. Pre-heat to 350-375 (According to cookie recipe)
2. Mix cookie dough according to recipe
TIP: When scooping dough onto pan, I use a tablespoon. It seems to make the perfect sized cookies for the jars
3. Bake according to recipe
4. Once cookies are done, set them aside

5. Oven must be at least 375 degrees (higher is okay), place EMPTY jar into the oven for 15-20 min
6. Boil tops while jar is heating up in oven.

(As I took this picture, Ellie kept saying "Momma! That's Hot! You're going to hurt yourself!" haha)
7. After the 15-20 min of heating the jar, place cookies in the jar.
TIP: This is where the tongs come in handy. It'll help put the cookies inside without burning your hands on the sides of the hot jar!
8. Once jar is full of cookies, twist on top and place at the back of the oven (it tends to be the warmest spot). It'll seal as normal.

Ta-Da! Cookies in a jar. Completely sealed and freshy goodness!
You can also use this to do brownie bites

Elizabeth wanted her spongebob cup to be included. I placed the box behind for those who wanted to know what I used. Philsbury Brownie Mini mix.
I want to hear feedback from the cookies! If you make them, feel free to share! :)
Next Up:
COBBLER! :) Yup, that's right!
Monday, June 13, 2011
A Touch Worth A Thousand Words
I bake quite a bit as most know. And if I'm not baking, I'm crafting. I do this at night and it is the time I have to myself, quiet, calm and very peaceful. But this is also the time that I like to take to sit outside when it is nice and cool.
I just sit, think and relax. I usually pray and reflect. Of course my prayers include Kristopher and the rest of 1/3.
Tonight I was having a tough time and missing him a lot. He knows I miss him, and I know he misses me. However, we don't make it a daily thing to say because well..we can't change him being gone so we choose to focus on happy, positive things. But I can't avoid it tonight. There is one thing I miss about him a whole lot. His touch.
And I don't mean anything sexual by that. I mean those subtle, loving touches. The way he holds my hand or holds me at night. I was going through our "engagement" photos (they ended up being our first photos as Husband and Wife, other than our wedding day) and I noticed the way we touched each other.
Sometimes I'm afraid that I've actually forgotten the way he feels. Most people feel their loved ones first thing in the morning and lastly at night. But I don't. I go months and many months before I get to feel his embrace. I'm not asking anyone to feel bad for me or anything like that because we wouldn't change our life. I've never been happier. The time apart from each other really helps us appreciate each other beyond belief.
Kristopher's touch is this strong feeling. I can't completely explain it. His hands cover mine and his arms fit perfectly around me. I'm so blessed to have these photos that capture it for me.


I miss him something fierce. I can't wait to feel his embrace again..
Photos Courtesy of Roza Bella Photography:
Cake In Jar Recipe: Cherry Point Pie
This one is very yummy! I really didn't think it would last the shipping to Afghanistan but went out on a limb and sent it anyways! I'm glad I did, my husband loved it. I would let you all in on what he said but...well, let's just say it's not g-rated. :) ((That's K for ya! haha))
So here we go!
Cherry Point Pie
aka Cherry Pie
Makes: 2-3 Pint Sized Jars
Prep Time: 15-20 Min
Cook Time: 35-40 Min
What You Need:
1. Pint Size Jars
2. Betty Crocker Pie Crust
3. Cold Water (you can use cold tap water, but for the sake of the photo, I used bottled)
4. Canned Cherry Pie Filling
5. Rolling Pin (not in photo)
6. Pizza Cutter (not in photo)
7. Flour (not in photo)

I will have links at the bottom to the home made, from scratch recipes for the pie crust and cherry filling for all you daring folks! :)
Pie Time!
1. Pre-heat oven to 400 degrees
2. Prep the Jars:
- Screw top off and place both pieces of tops into boiling water (Boil for 5 minutes, take out, dry and set aside)
- Hold empty jars about a foot away and spray a very light coat of Pam Spray into jar. (I always do this over the sink so the "loose" spray will fall into the sink and not on the floor or counter)
Set Jars & Tops aside
3. Mix pie ingredients as instructed. You'll end up with a pretty slab of dough.


Let your little brats join too! :) Here's Ellie with her own piece of dough.
4. Sprinkle flour over clean, flat surface and roll out then trim off each side to make straight (or as straight as possible lol) sides.


5. Cut out pieces and then "piece" them together into the jar as shown in the photos below.
TIP: Make sure to pinch each together. If you can't fit your hand into the jar, use a wooden spoon :)


It doesn't have to be perfect. If there is an open spot, simply cut a piece and patch together! :)
6. Pour in yummy filling! Make sure to leave space at the top.
NOTE: The filling does boil slightly in the oven.

(This usually takes half the can if using Pint Sized Jars)
7. Cut our circle from dough
TIP: Cheat and use the top! :)

8. Cover filling with dough. Pinch together to seal filling in

9. Cut little strips and add to top of pie.

Feel free to do any design. Maybe a heart, initial or a smiley face. It looks great when your loved one opens it.
10. Place in on cookie sheet and into the oven for 35 min

11. Once done, crust will be a golden brown. Immediately tighten top onto jar and place on oven to seal.
Let cool then decorate!
My husband's mail takes about 5-6 weeks. After getting this pie we were both nervous but he vowed to be my guinea pig so he had to eat it :) He loved it. You can fill it with any fruit filling.
Good Luck! Please feel free to share your photos with me!
Next up: Kabul Cookies!
Scratch Recipes:
Cherry Filling:
http://www.tammysrecipes.com/cherry_pie_filling
Pie Crust:
http://allrecipes.com/Recipe/butter-flaky-pie-crust/Detail.aspx
This crust needs to be cooled overnight (preferably) but I love the recipes made with butter rather than shortening. :)
Cherry Filling:
http://www.tammysrecipes.com/cherry_pie_filling
Pie Crust:
http://allrecipes.com/Recipe/butter-flaky-pie-crust/Detail.aspx
This crust needs to be cooled overnight (preferably) but I love the recipes made with butter rather than shortening. :)
Sunday, June 12, 2011
Cake In Jar Recipe: Oorah-ky Road
In the short time my husband has been deployed I have been asked "how do you make those?!" and given out many tips, recipes and instructions on making cakes in jars! I have decided to post a recipe every week till my little brain runs out. hehe I will try to make things as simple, quick and original as possible so when you make them for your loved ones you'll be the talk of the town or as my husband calls me the "COP mom" :)
Today's recipe:
Oorah-ky Road
aka. Mississippi Mud Pie
Makes: 3-4 Pint Sized Jars
Prep: 15-20 Min
Cooking Time: 35-40 Min
What do you need:
1. Pint Size Wide Mouth Jar
2. Non-Stick Spray (I prefer Pam)
3. Cookie Sheet
4. Shish Kabob Sticks (Optional)
5. Either:
-One 7oz Jar of Marshmellow Creme (I prefer the taste of this, but it's a bit messier)
OR
-Bag of Small Marshmellows
6. Betty Crocker Mississippi Mix (I will be doing an all scratch recipe soon)
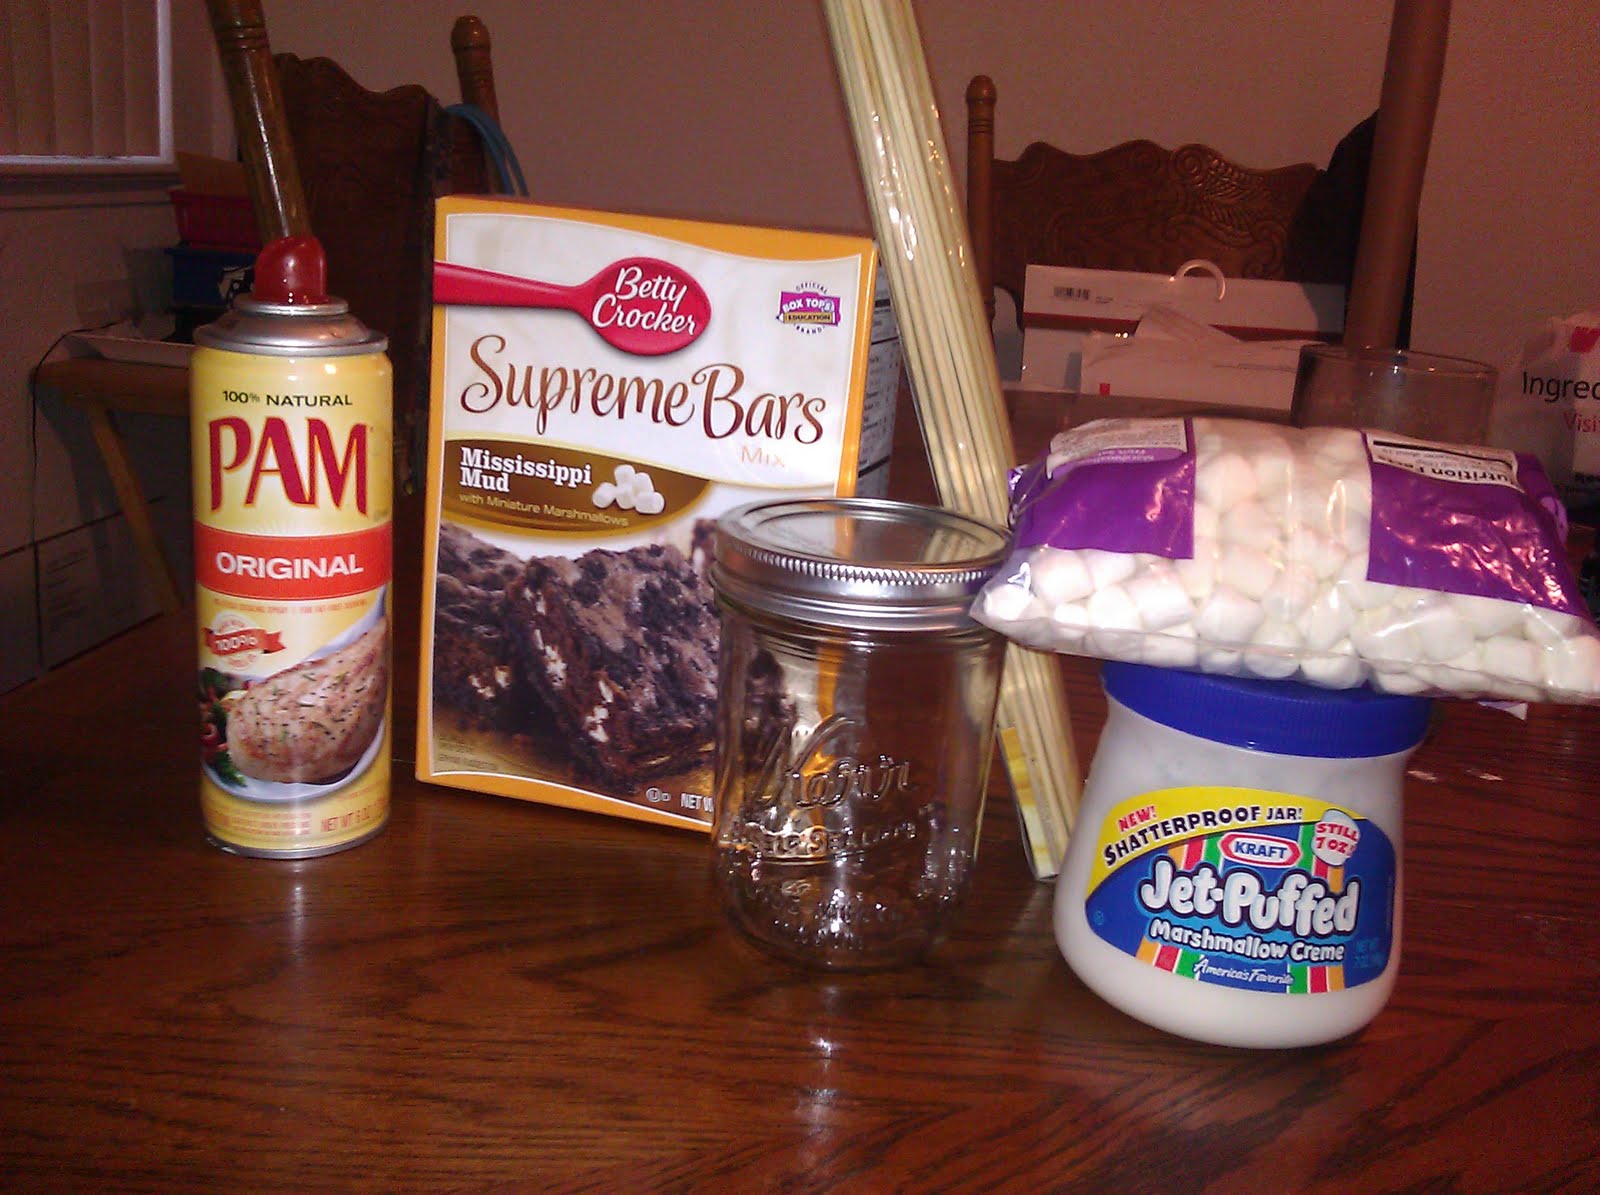
(Note the missing top to my Pam Spray. You can ask my 2.5 year old where that went :-P lol)
Now let's make some goodies!
1. Pre-heat Oven to 400 degrees. (I do this first, always, because it takes a little bit to pre-heat)
2. Prep the Jars:
- Screw top off and place both pieces of tops into boiling water (Boil for 5 minutes, take out, dry and set aside)
- Hold empty jars about a foot away and spray a very light coat of Pam Spray into jar. (I always do this over the sink so the "loose" spray will fall into the sink and not on the floor or counter)
Set the jars & tops aside
3. Mix Mississippi Mud Pie and prepare according to box. You will have a bowl of chocolate mix and a small bowl of crumb mix once done.
4. Take one jar, drop a spoon of crumb mix onto the bottom of the jar. Flatten out to make a thin "crust".
5. Pour a small amount of chocolate mix over the crumbs
6. If you bought the bag of marshmellows, just sprinkle some of them over the chocolate mix to make a layer of marshmellows over it.
OR
if you have the marshmellow creme, dump a spoon full onto chocolate mix. It will not flatten to a layer, but that's okay! (Actually makes it look very cool!)
TIP: When pouring any ingredients into the jar, get as little as possible on the sides of the jar. If it does, take a paper towel and wipe clean.
7. Repeat steps 4,5 & 6 till you reach the middle of the jar. Normally, you'll just repeat them once (unless you are using a larger jar)
Tip: When possible, "end" with the crumbs on top! If marshmellows are on top when cooking, they harden and make eating unpleasant ;)

My uncooked jar. Yes, I cleaned it off before cooking ;)
8. Place jars onto a cookie sheet (or tin pie pan as shown in picture) and into the oven they go!
9. Cook for 35 min. Check by poking center of jar with a shish kabob stick all the way to the bottom. If done, it'll come off fairly "clean" (meaning no goopy mix will be on it)
If it's not done, keep in for 5 more minutes and keep checking till done.
10. Once done, pull jars out and immediately place the tops onto the jars and tighten.
TIP: I use a bath/hand towel to tighten. Oven mittens do not give you enough grip to tighten as well.
11. Place jars with lids onto the oven and wait. :) You might even hear the *POP* sound while they're sealing.

You'll notice if you use the Marshmellow Creme, it Puffs out to the top, that's perfectly okay and makes it taste nice and fluffy!
Once cooled, you can decorate as you please and you're done!


Photo of another jar I finished. MCRDelight. Just an example of how you can decorate it. Even tie on a plastic spoon for convenience!
I have sent TONS to my husband and buddies overseas. The shipping takes 5-6 weeks to get to them. I've only had one break (it was one of my first) and all stay nice and fresh! The only complaint I've had was the ones that have added food coloring. So if you're shipping time is long, stay away from food coloring :)
Enjoy!! Keep an eye out for more to come!
Next up: Cherry Point Pie
Subscribe to:
Posts (Atom)